


A proper floor tiling process is important to achieve a strong, even, and long-lasting floor surface. Understanding floor tile installation, step-by-step, helps you plan the work properly, choose the right materials, and avoid issues like uneven tiles or cracks.
Types of Floor Tiles You Should Know
Before starting floor tiling, it is very important to choose the right type of tile for your space.
1. Ceramic Tiles – A budget-friendly and versatile tile option used in Indian homes for kitchens, bathrooms, and low-traffic areas.
2. Vitrified Tiles – Durable, low-maintenance tiles with low water absorption, making them ideal for living rooms.
3. Porcelain Tiles – Highly durable tiles that offer a premium finish and work well for both indoor and outdoor spaces.
4. Natural Stone Tiles – Made from materials like marble, granite, or sandstone, these tiles add a luxurious touch to homes.
5. Cement Tiles – Handcrafted patterned tiles known for their artistic appeal, often used for statement floors and accent walls.
Tools and Materials You Need for Floor Tile Installation
Having the right tools and materials is essential for smooth and accurate floor tiling work.
For proper floor tile installation, you need tile adhesive or cement mortar, grout, water, and quality floor tiles.
Essential tools for floor tiling include a trowel, measuring tape, tile cutter, spirit level, rubber mallet, and sponge.
Safety first:
Safety gear like gloves, knee pads, and goggles should always be used during floor tile installation to prevent injuries.
Step-by-Step: How to Tile a Floor
Each step of floor tile installation must be done carefully to ensure proper alignment, strength, and a smooth surface.
Step 1 - Mark Your Reference Lines
Mark straight guidelines for proper alignment during floor tile installation.
Step 2 - Mix the Tile Adhesive or Cement Mortar
Prepare the mixture carefully to ensure strong bonding during floor tiling.
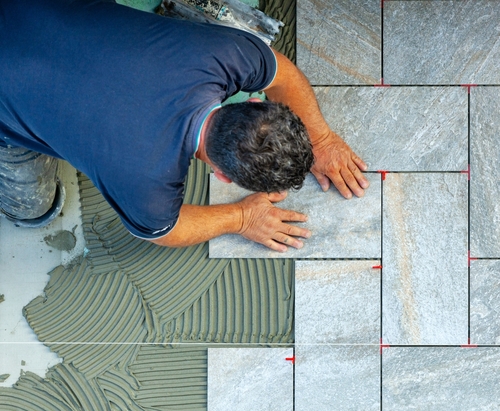
Step 3 - Apply Adhesive on the Floor
Spread adhesive evenly using a notched trowel before placing tiles.
Step 4 - Place the First Tile Correctly
The first tile decides the direction for the entire floor tile installation process.
Step 5 - Use Tile Spacers for Even Gaps
Spacers help maintain uniform gaps and a clean finish in floor tiling.
Step 6 - Cut Tiles for Edges and Corners
Cut tiles accurately to fit corners and edges neatly.
Step 7 - Check Level After Every Few Tiles
Keep checking alignment to avoid uneven surfaces during floor tile installation.
Step 8 - Let the Adhesive Cure Before Grouting
Allow proper drying time so tiles bond strongly.
Step 9 - Apply Grout Between Tiles
Fill gaps with grout to lock tiles and prevent moisture entry.
Step 10 - Clean and Polish the Tiled Floor
Clean the surface after completing the tile installation process for a polished look.