Share:
Home Building Guide
Our Products
Useful Tools
Home Building Guide
Products
Share:
You can make cooking gas from daily kitchen waste
A small biogas plant for a home is enough for a family
You do not need costly items to start
With daily care, it works safely and smoothly
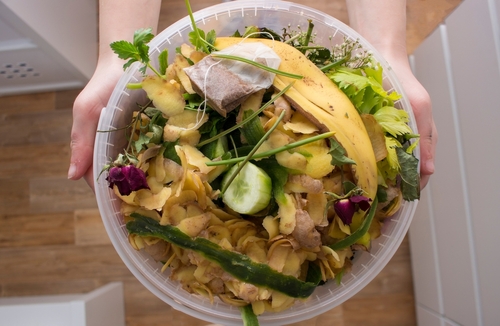
Every morning, you cut vegetables, and the peels go into the dustbin. The leftover food and the evening tea waste are also thrown away. But what if all this waste can save you money every month?
All that wet kitchen waste can instead go into one container near your home, and the gas starts coming out of it. You connect this gas to your stove. You cook food using waste that you earlier threw away. This is what a biogas plant for homes does.
With a biogas plant for a small house, you can:
Use gas for daily cooking
Reduce kitchen waste
Use less LPG
Keep your surroundings cleaner
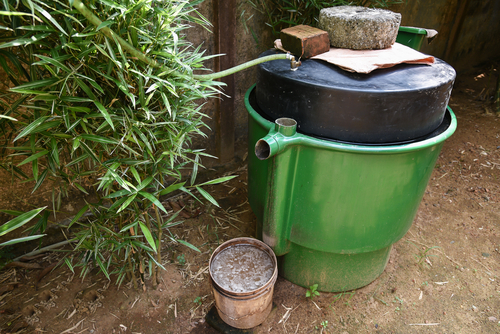
To understand a biogas plant properly, you first need to know the things required. A simple biogas plant for the home has four main parts:
Digester tank
Inlet from where you will add the kitchen waste
An outlet, also called a compensation tank
Gas pipe
Storage system
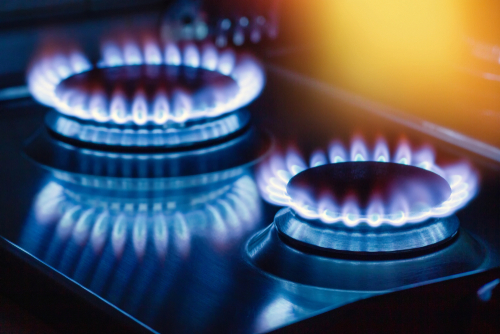
Biogas stove
Let’s understand each part and how everything works step by step.
Here are the steps to make a small biogas plant for home, so that you can save some money:
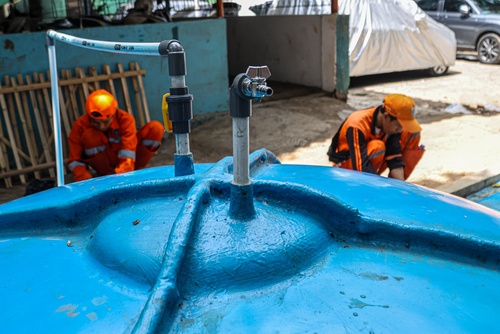
First, you need to place the digester tank. This is the main container of the biogas plant. This is where the gas is made.
Keep the tank outside, in an open area
The tank must be strong and fully closed
No air or oxygen should enter the tank
This is very important because biogas is formed only when there is no oxygen inside. If air enters, gas formation stops. The shape and size of the digester can be different. It depends on:
How much kitchen waste you have daily
What material you use to make the tank
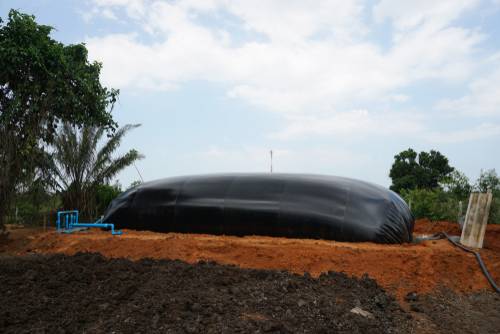
Some digesters are round, some are drum-shaped, and some are giant PVC plastic bags. All work well if they are strong and airtight. You can get a small digester based on your garden space.
Prepare the opening where you will add the wet kitchen waste. Take vegetable peels, food leftovers, and fruit waste. Add half water in a bucket and half waste. Mix well and add it to the digester. Do not add plastic, paper, or oil.
You can also add cowdung at first and keep it for 15 to 20 days. Mix cowdung and water in a 1:1 ratio into the digester. After that, you can start adding your kitchen waste and using the gas. Once the waste goes in, it stays inside the digester and slowly starts breaking down.
Tip: Chop kitchen waste into small pieces before adding it, this helps gas form faster. |
After you add waste daily, something simple but powerful happens inside the tank.
Small, natural germs start eating the waste and produce gas slowly
Gas moves upward in the digester because it is lighter than waste. Liquid and solid waste stay below.
You do not need to do anything here. Just let the digester stay closed and undisturbed.
Attach a pipe on top of the tank. This pipe carries gas from the tank to the stove via a storage place. As gas comes out of the digester, it slowly fills the storage space. When the gas storage fills, you can easily know that gas is ready to use. The gas pipe then carries this gas safely to the cooking stove.
The gas can be collected in different ways. Some setups use a gas holder or a gas bag. Some use a thick & strong rubber tyre or tube. It works like a balloon and stores gas. The important part is that it must be airtight and safe.
Safety Tip: Use the gas regularly so the storage unit does not stay overfilled for long. |
When gas moves from the digester into the tyre, empty space is created inside the digester. If this empty space is not filled with anything, it might get filled with outside air, which can destroy the system.
To fill this space:
The outlet tank gets filled with used waste called slurry. When you add more kitchen waste, the slurry starts to move out from the digester into the outlet tank.
When gas is emptied into the gas collection system, slurry in the outlet flows back into the digester to fill the space.
This back-and-forth movement:
Keeps pressure balanced
Stops air from entering
Helps gas keep forming every day
The slurry collected in the used waste outlet is very good for plants. So you can use it by diluting it in a 1:6 ratio for the plants. Note that you should never empty all the slurry at once. Always leave some slurry inside the outlet.
After about 10 to 20 days, gas will start coming.
The first gas may not burn well
After a few days, the flame becomes steady
You can now use the gas for cooking
If all parts are in place and used correctly, a biogas plant for the home can work safely and smoothly for daily cooking needs.
The Simple Flow of How a Biogas Plant For Home Works Together:
|
Safety is very important. Follow the steps below to make sure a biogas plant for a small house is safe to use:
Keep the tank fully closed
Do not light a fire near the tank
Check the pipe for cracks
Do not overfill the tank
Keep children away from the setup
Safety Tip: If you notice a bad smell, check for air leaks or overfilling immediately. |
A home biogas plant helps you turn daily kitchen waste into useful gas. It reduces waste, lowers LPG gas use, and supports a cleaner way of living. Learning how to make a biogas plant at home is easy when you follow simple steps.
With regular waste addition and basic care, a small biogas plant for your home can support your everyday cooking needs.
Once the biogas plant for the home is ready, the gas made from kitchen waste costs almost nothing.
Yes, it is safe when the tank and pipes are checked regularly.
Yes, because it uses waste from your own kitchen.
Needs daily waste feeding
Gas takes time to start
Tank needs cleaning
Bad smell if not maintained
Cannot handle dry waste