Share:


Share:
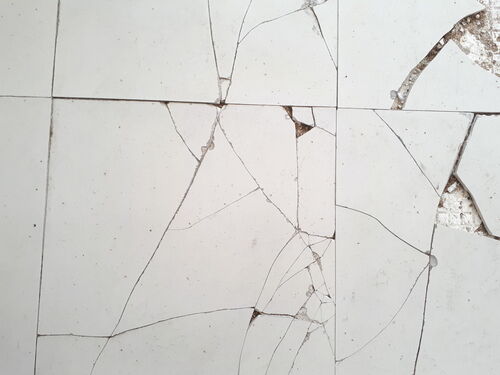
• It is important to address cracked floor tiles to enhance safety and preserve aesthetic appeal.
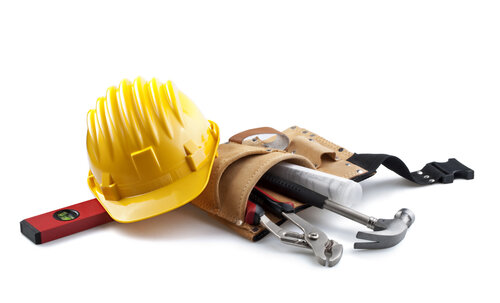
• Gather necessary tools, including adhesive, replacement tiles, and safety gear, for a successful repair.
• Prioritise safety by covering nearby areas and wearing protective gear during the repair process.
• Follow a step-by-step process, from cleaning to grouting, ensuring careful execution at each stage to prevent damage.
• Conclude the repair with final grouting, adding stability and a seamless finish to the replaced tile.
Let’s first start off with the right equipment to help you fix a broken floor tile:
The first thing you need is an adhesive. Choose a high-quality adhesive suitable for your specific tile type and the surface you're working on. Another important material is a new tile. Select a replacement tile that matches the size, colour, and texture of the existing tiles to maintain a cohesive look. You'll also need grout to fill the spaces between the tiles once the new tile is in place. Ensure the grout colour matches the existing grout for a seamless finish. Finally, a masking tape aids in protecting adjacent tiles, guiding proper alignment, managing excess adhesive, and maintaining clean grout lines.
A grout remover can be used to efficiently remove old and deteriorated grout from between tiles. Additionally, a combi drill is useful for drilling into various materials, including wood, metal, and masonry. Along with these a hammer chisel, used in conjunction with a hammer, is a tool for chipping away and removing tiles, mortar, or other materials. A grout spreader is a tool used to evenly apply grout between tiles. It helps achieve a neat and uniform grout application, ensuring that the spaces between tiles are adequately filled. Another important tool is tile spacers, which maintain consistent spacing, ensuring uniformity between tiles and facilitating the grouting process. A trimming knife, ideally with a 2-3 inch blade and replacement blades, is useful for cutting and shaping materials such as tile, grout, or adhesive. A bucket of water and a sponge are essential for cleaning tools, wiping surfaces, and managing excess grout or adhesive during tile installation. The sponge provides a controlled and precise means of cleaning.
While not always necessary, wearing gloves can protect your hands from sharp edges and the materials used during the tile replacement. Protect your eyes from debris and sharp edges by wearing safety glasses throughout the tile replacement process. A dust mask is a valuable protective accessory when repairing a cracked tile. It helps ensure your respiratory well-being, compliance with safety standards, and a cleaner, healthier working environment.
First things first, ensure you have all the safety gear required. Let us now discuss how to repair cracked floor tile.
A messy area can cause more damage than fixing. Ensure you start off with a clean set-up. Dry the surrounding area with a soft cloth. Fixing a broken/cracked tile can cause dust to accumulate so you may want to lay out the dust sheet before you begin work. If you have plugholes nearby, cover them as you don’t want dust to clog the plug points. These are some of the basic starting points of how to ensure tile crack repair.
Use a grout remover to help loosen the grout of the cracked tile. In the process of trying to figure out how to fix a crack in tile, ensure you don’t damage the surrounding tiles. Use masking tape in the centre of the damaged tile so that you don’t accidentally slip and crack another tile.
Removing the grout is an extremely important task as any grout left behind in between the tiles can cause compression on the surrounding tiles leading to cracks.
Use a drill machine to establish a hole in the cracked tile. Ensure you don’t go too fast as you may damage any pipes or cables that may have been laid below. Begin drilling at a slow pace into the tape at the centre of the broken tile.
Once a hole has been made, you can move faster to drill deeper.
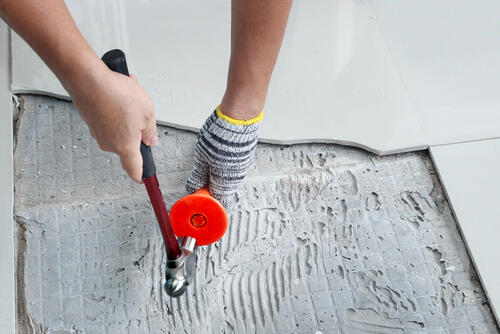
This step will help you understand how to remove a broken tile. Use a chisel to start removing the pieces of the tile from the holes that you created while drilling.
Don’t be too rough and impatient, start off from the centre of the tile moving towards the sides. Be careful not to let the pieces damage the adjacent tiles.
If there is any adhesive left, remove the same with a trimming knife.
This is one of the most crucial steps in the process of how to fix chipped floor tiles. Firstly, try to position the replacement tile without using any adhesive to ensure it fits in perfectly. If it protrudes out from the rest of the floor/wall tiles, then you may need to remove the excess adhesive present before fitting in the new tile.
Once you are happy with the setting, coat the back of your replacement tile with adhesive using a grout spreader and firmly position the new tile so that it sits in with the rest of your floor/wall seamlessly.
Once you are successful in your endeavour of how to repair a broken floor tile and have fitted the new tile, you will need to grout the tile to ensure its secured. To do this, first, fit tile spacers to maintain space for the grout to fit in and also to ensure that the tile does not slip off before the adhesive dries.
After a day, you can remove the spacers and add the new grout into the space around the replacement tile.
This helpful step-by-step on repairing floor tiles cracking and lifting can come in handy at times of need. You are now aware of the tools, safety gear, and the process of fixing a cracked floor tile. With this extensive guide on how to repair cracked floor tile, you'll be well-equipped to tackle the task of replacing a cracked tile and restoring the appearance of your tiled surfaces.